Introduction to LaTeX

LaTeX (yes, written exactly like this) is a system that allows you to write documents without worrying about the style of the presentation.
You can say that it is like you are coding a text instead of using Microsoft Word or Google Drive.
Because all the formatting definitions are defined in a single place (the main document), you just need to write plain text and LaTeX will worry about how to render it the correct way. This is highly used by scientific magazines, universities’ thesis. book publishers and many more people. For instance, universities and scientific journals usually have a template that you can download and the document will be immediately in the formatting it should be. This also includes the formatting of bibliography that can be quite painful (trust me).
Also, LaTeX has this coding-like style that allows you to use git for document versioning which makes your life so much easier. And I swear it makes your documents look so much prettier than with any other tool.
I have used LaTeX before (waaaaaaaaaaaay back) and it was painful. At the time there were little materials and tutorials and I couldn’t understand the errors. Years later, when I was doing my master thesis it saved my life because having the correct bibliography and style could hurt my final grade.
Since I started playing with it again these days I decided to create this introduction to LaTeX 🤓

Installation
You can install it in any OS by downloading it here: https://www.latex-project.org/get/
Some basic concepts
In LaTeX, you have commands that start with a \ symbol. You can have a one time only command, such as the one to make a text be in italic:
\emph{Text in italic}
You also have commands that have a start and an end, and they can be applied on anything between the open and closing definition. One example is the command for making a text to be centralized:
\begin{center}
Text in center
\end{center}
Some commands also allow you to add a configuration to it. That is usually done by inserting a [] between the command itself and the details inside {}. For instance, the following command makes the document of type memoir but configures the fontsize of the document to 12:
\documentclass[12pt]{memoir}
You can also avoid lines to be processed by commenting them using the % symbol:
This line will be processed
% This won't
And if you ever need a character that has a purpose on LaTeX you can escape the symbel by using the \ symbol just before the symbol.
This line will be procesed
% This won't
All this \% line will!
Minimum working program
We can create a small file mydoc.tex. The file begins with a declaration of the type of document we are choosing to render. In this case, I chose a memoir. I also added some extra configuration of title and author. The document itself (what will actually be rendered) only starts after the tag \begin{document} .
% mydoc.tex

% These are the configuration
\documentclass[12pt,openany]{memoir}
\title{My LaTeX book}
\author{Leticia Portella}

% This is what will actually be rendered
\begin{document}
\maketitle

Lorem ipsum dolor sit amet, consectetur adipiscing elit, sed do eiusmod tempor incididunt ut labore et dolore magna aliqua. Ut enim ad minim veniam, quis nostrud exercitation ullamco laboris nisi ut aliquip ex ea commodo consequat. Duis aute irure dolor in reprehenderit in voluptate velit esse cillum dolore eu fugiat nulla pariatur. Excepteur sint occaecat cupidatat non proident, sunt in culpa qui officia deserunt mollit anim id est laborum."

\end{document}
If you now run the following command, you will get a PDF that is the result of this file:
pdflatex mydox.tex
And you already have something that looks so pretty…
You will see that along with the PDF file, LaTeX created two additional files *.aux and *.log. These are auxiliary files and they can be deleted afterwards with no problem.
This is my basic .gitignore for avoiding commiting auxiliary files (and the pdf):
*.pdf
*.gz
*.log
*.aux
*.blg
*.bbl
*.swp
*-blx.bib
Organizing the document
It is usually very bad to throw everything in a single document, so I usually I make one .tex the default base document while creating other .tex files for the text itself.
For instance, we can create a new chapter1.tex that has only some text:
% chapter1.tex
Lorem ipsum dolor sit amet, consectetur adipiscing elit, sed do eiusmod tempor incididunt ut labore et dolore magna aliqua. Ut enim ad minim veniam, quis nostrud exercitation ullamco laboris nisi ut aliquip ex ea commodo consequat. Duis aute irure dolor in reprehenderit in voluptate velit esse cillum dolore eu fugiat nulla pariatur. Excepteur sint occaecat cupidatat non proident, sunt in culpa qui officia deserunt mollit anim id est laborum."
And then add this file to my original document:
% mydoc.tex

% CONFIGURATION SECTION
\documentclass[12pt,openany]{memoir}
\title{My LaTeX book}
\author{Leticia Portella}

% DOCUMENT SECTION
\begin{document}
\maketitle

\include{chapter1}

\end{document}
Because of that, you can worry about each chapter individually or organize it as you prefer! No more thousands of lines in a single file!
Divisions!
LaTeX allow 7 types of division (in hierarchical order):
\part{My part} is the main division. It usually takes a whole page.
\chapter{My chapter} will start a new page and a chapter within the previous defined part (if any)
\section{My section} a section within the previous defined chapter (if any)
\subsection{My subsection}
\subsubsection{My subsubsection}
\paragraph{My paragraph}
\subparagraph{subparagraph}
You can then add a table of contents inside your document by adding the following command:
% add to DOCUMENT section of mydoc.tex
\tableofcontents
And you can then define which are the most nested division that you want your table of content to have. -1 is for Part, 0 is for chapters, 1 is for sections and so on.
% add to CONFIGURATION section of mydoc.tex
\setcounter{tocdepth}{2}      % Level presented in table of contents
We can also use a command to refer to other chapters. Let’s say we have a chapter called “My first latex book”. I can add a \label command with an identifier right after it:
% add to DOCUMENT section of mydoc.tex
\chapter{My first chapter!}
\label{chap:my-first-chapter}
Now I can go to another chapter and reference this chapter:
% add to DOCUMENT section of mydoc.tex
As we will see in chapter \ref{chap:my-first-chapter}, ...
The \label command can be used by any division and will be later used for tables and images as well!
Using packages
Another brilliant thing about LaTeX is that you can add packages to help you deal with your document. For instance, if you want images on your document, you just need to add the package for graphics called graphicx:
% add to CONFIGURATION section of mydoc.tex
\usepackage{graphicx}                      % alow images
And then you can use images on your documents:
% add to DOCUMENT section of mydoc.tex
\begin{figure}
  \centering
  \includegraphics[width=\linewidth]{img/my-imagepng}
  \caption{Subtitles!}
  \label{fig:clients}
\end{figure}
Oh… but graphicx adds the images where it thinks is the best place! So we can add a package that forces the image to be exactly where we wanted it to be on the text:
% add to CONFIGURATION section of mydoc.tex
\usepackage{float}                         % image location ([H])
and then use it like this:
% add to DOCUMENT section of mydoc.tex
\begin{figure}[H] % Guarantees the image will be rendered exactly where you defined it
  \centering
  \includegraphics[width=\linewidth]{img/my-imagepng}
  \caption{Subtitles!}
  \label{fig:clients}
\end{figure}
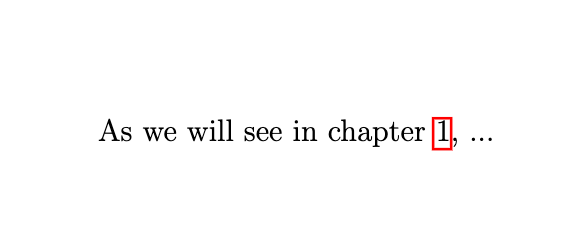
Another cool package that I like is hyperref. It makes the table of contents, images and chapters references, bibliography, etc, to hyperlinks! This way you can move through the document in an easy way.
% add to CONFIGURATION section of mydoc.tex
\usepackage{hyperref}                      % add items as links
Now any reference will be displayed as this:
If you need to display code within your document, check the very brief post I made about minted.
Bibliography
This is, by far, my favorite tool in LaTeX. Because bibliography can be super annoying (especially in academia).
To add bibliography to a LaTeX document we will create a file called mydoc.bib. We can add a book reference to it:
% mydoc.bib

@book{Armour,                                         % Armour will be the id
  author    = "P. G. Armour",
  title     = "The Laws of Software Process",
  publisher = "Auerbach",
  year      = "2003",
}
Then, on the end of the document section, we need to add that this file will contain our information for bibliography:
Then, on the end of the document section, we need to add that this file will contain our information for bibliography:
% add to DOCUMENT section of mydoc.tex
\bibliography{mydoc}       % name of the bibfile
\bibliographystyle{plain}  % we will use the plain style
Now we can go to our document and use this book as reference:
% add to DOCUMENT section of mydoc.tex
As written by \cite{Armour}, ...
The only thing with bibliography is that you have to run 4 commands (yes, 4) to make it work:
pdflatex mydox.tex
bibtex mydoc.bib
pdflatex mydox.tex
pdflatex mydox.tex
Yes, you have to run pdflatex twice after creating the bib auxiliary files (have no idea why, but I swear it is on the official documentation).
Using VSCode
It became kind of annoying to write the document in one place, run the commands in the terminal and then re-opening the pdf to see if things were working. Especially when I discovered that the main PDF readers I knew didn’t refresh a PDF file that is already open when it changes.
VSCode solved all my problems! You can see in the figure below that on the left side, I have a LaTeX extensions that has a quick-link to any division and label I add to the document. I can divide the main section between the tex files and the pdf . The cool thing is that VSCode already regenerates everything once you save a *.tex file but you still have the option to run the command on the bottom terminal:

And by adding the LaTeX extension, you can also have access to some pretty useful commands, like and automatic command for deleting auxiliary files:

I am not a super fan of very big IDEs… but omg this made my life 1000 times easier!
Minimum working example
Check my wiki if you want a minimum working example 🤩
❤ Cheers! Letícia