A quick overview on Git and Github

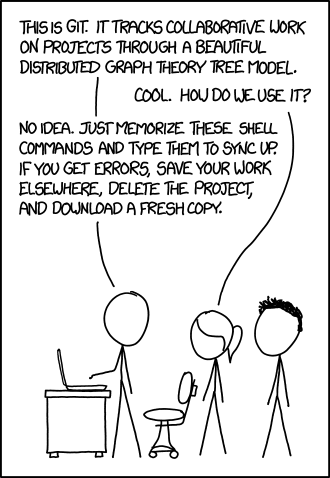
Hacktoberfest is here and it is an awesome moment to contribute to open-source! However, Git and Github can be quite scary, so let’s talk a bit about the basics of these two extremely useful tools!
Versioning
Git is a versioning system that was designed focusing in code versioning. It basically helps us to handle file modification in an easy and painless way.
Github, on the other side, is a company that implemented a system that allows you to use git to version your code while storing the code in their cloud. But it is not the only company. Bitbucket and Gitlab are other examples of companies that have systems that allow storage and group interaction while using git versioning.
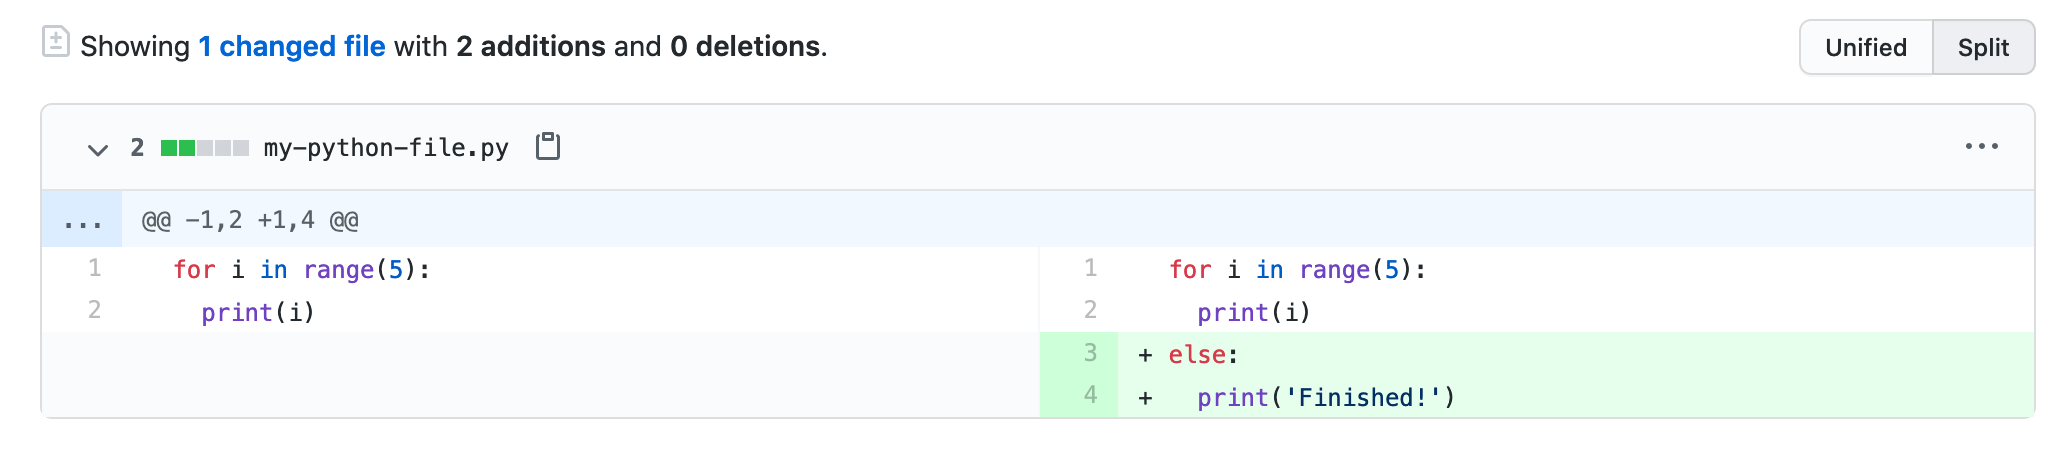
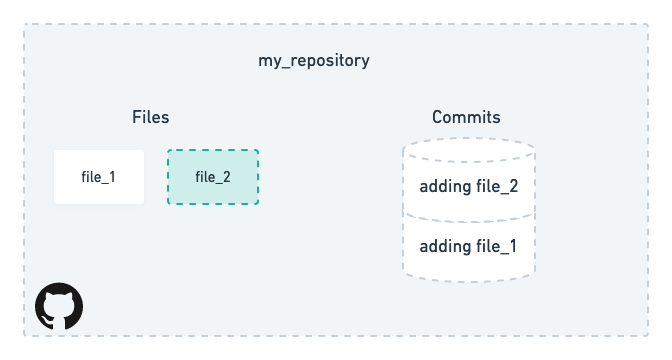
Take for instance that you have a file that is a Python file that only has a simple for loop like this:
for i in range(5):
  print(i)
Then my friend sees this and decides that my code can use a couple of changes. What they can do, is propose a change in my code, and if they do it using Git and Github, it will look something like this:
And the interesting part is that this change is wrapped in a small package called a commit, that receives a unique hash as an identifier. You can also add a message to this package, identifying the change that was made. In the image you can see on the right side the first few digits of the commit (1551bd2) and on the left side the commit message for that change:

Because each change is a single package, it is easy to return back to a previous version or to find who did what and when!
It seems simple but is an invaluable tool for developing both over time and with large groups. The abilities to see the changes allow that you share your code before adding it to the main codebase, which allows maintainers to suggest change, guaranteeing code quality.
Git basics
There are a couple of main commands that you must know to work with git, so let’s take a closer look at it.
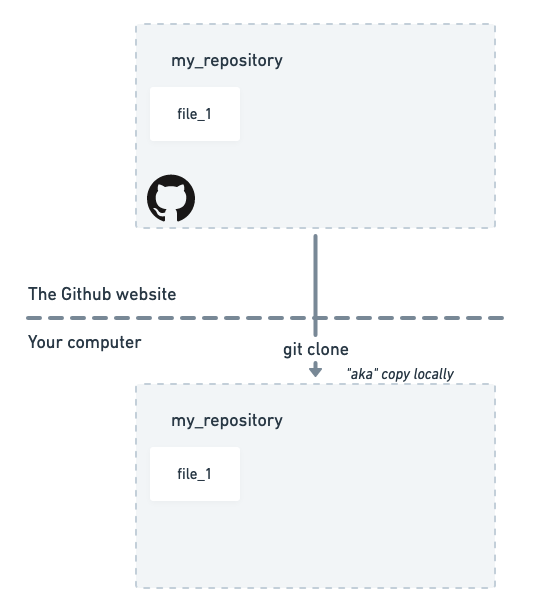
A main folder that contains a codebase is called a repository. When you want to copy the code from a repository that is on Github’s website you use the command git clone <url-to-repo>, like this:
$ git clone https://github.com/leportella/git-example.git
And this is what you are actually doing:
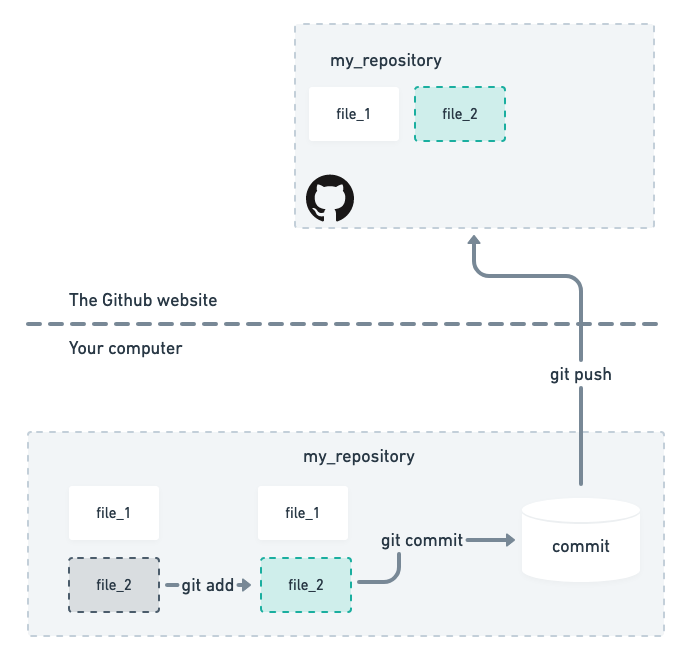
Then you can modify any file you want in your local repository (on your computer), and none of these changes will affect the codebase yet. Now let’s say that you wanted to add a new file and send it back to the remote repository. You first select the file that contains the changes you want to make by using git add <filename>. Then you can wrap all changes in a single commit. We can do this by using git commit -m "<a message explaining the changes>".
The distinction between add and commit is important. The add mark the files that will be added to the commit while commit actually closes the changes in a single commit and makes it ready to go!
Finally, we want to push this commit the Github website, this is, back to the original codebase! We do this by using git push. The overall structure is like this:
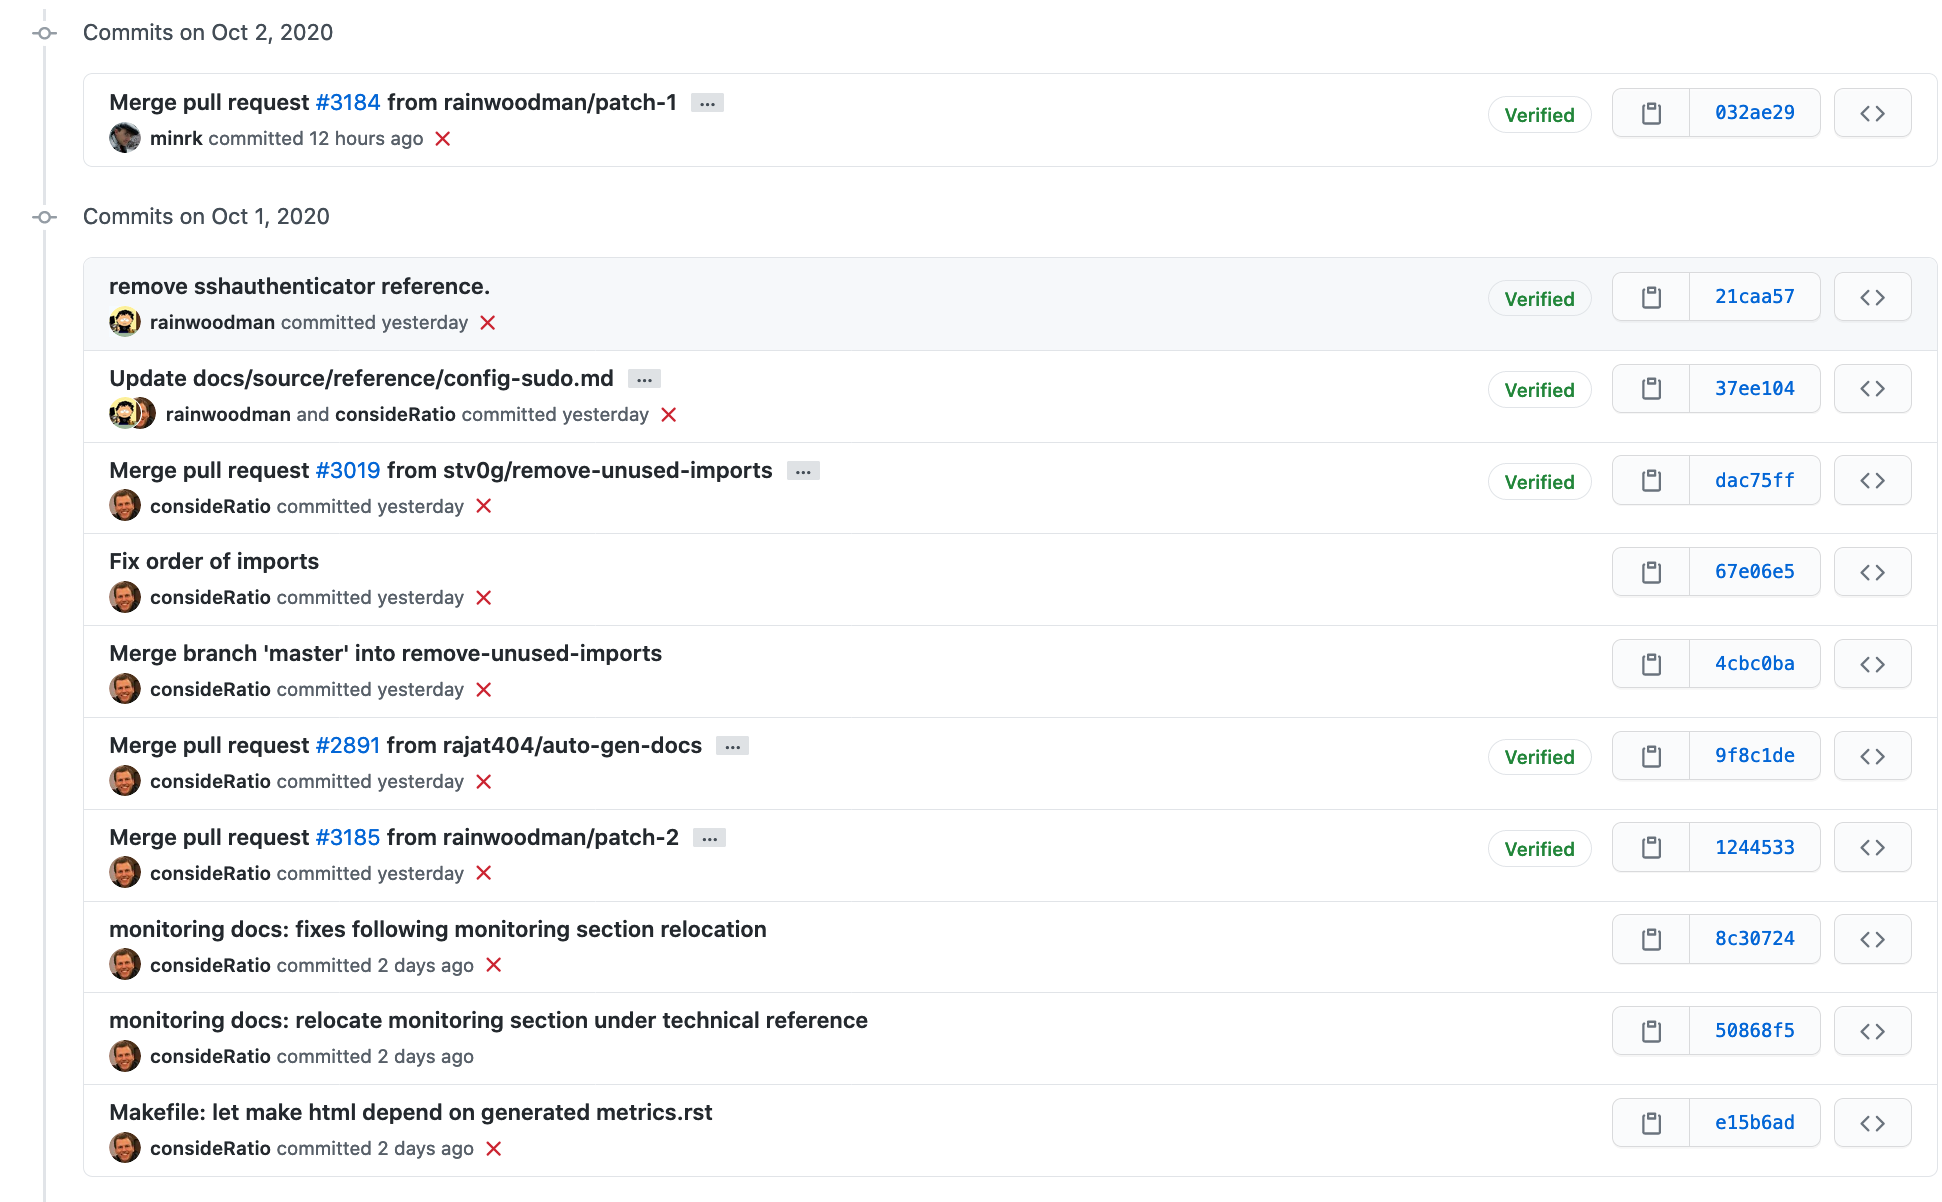
Because each change is packed in a commit, the repository can keep both the files, and each commit, in the same order they were made:
On Github, it looks like this:
Github
When developing on github, however, the first thing you must do when you are working with a repository that is not yours, is to fork it. To fork a repository is basically to copy a repository from another person Github account to your personal account.
This is necessary because only listed contributors can add code directly to the repository. By copying to your account, it is safer because the only way to add code is by a pull request.
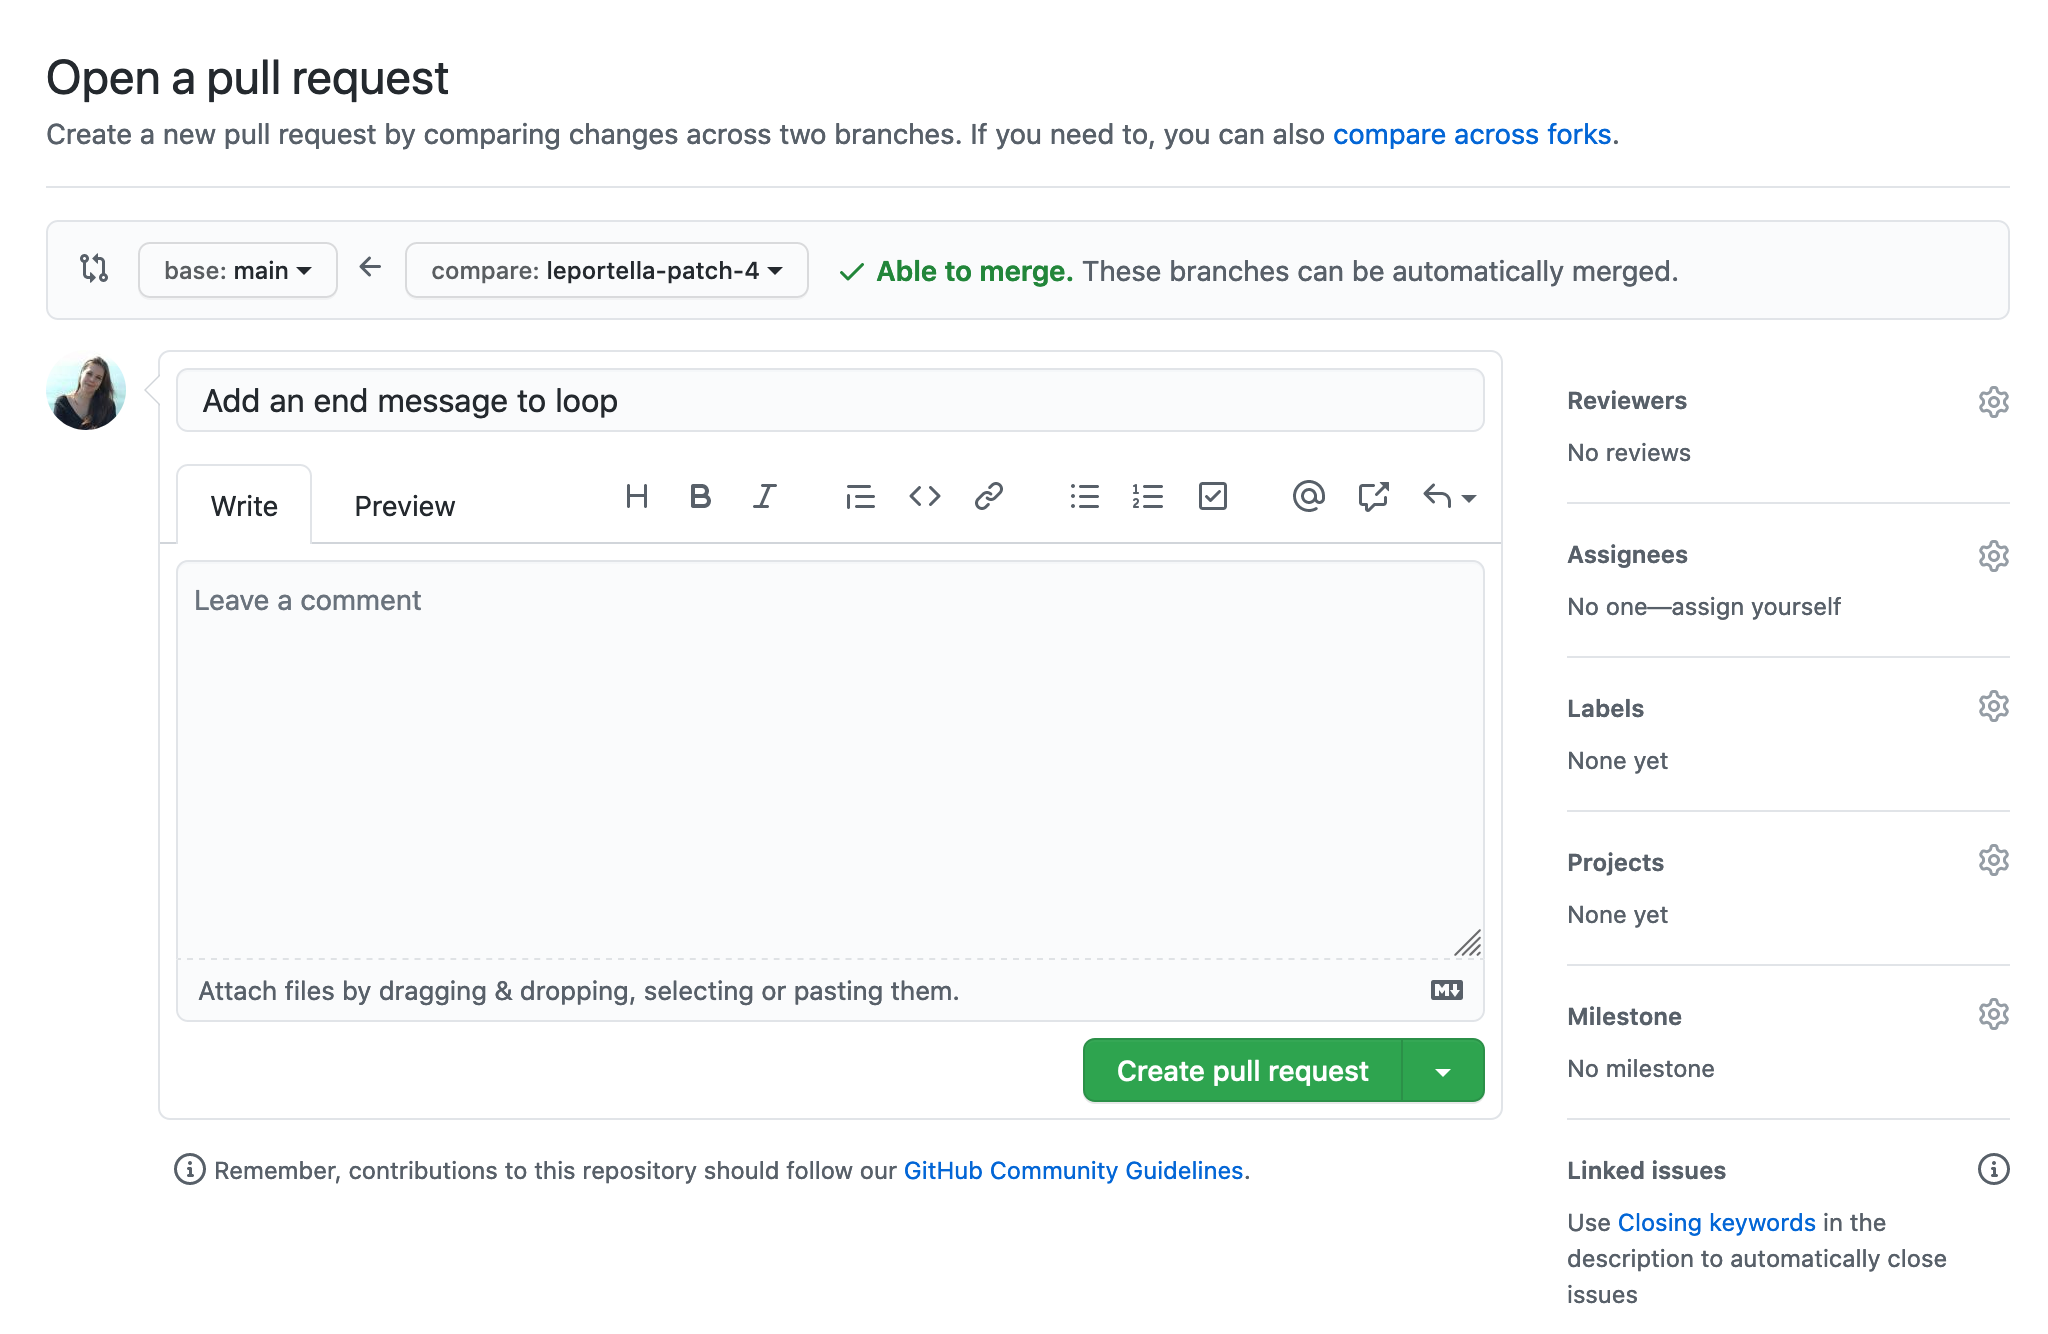
A pull request is Github’s terminology for suggesting code changes. One you pushed the code back to the cloud, you will be able to open a pull request, that can be evaluated by the maintainers of the repository. The changes I showed you on the first image, was actually how a code change is presented at a pull request!
This is what it looks like when you are opening a pull request. You can see on the top that I suggesting to add the code to master.
This is a good pattern: you propose changes, learn with more experienced people and everybody wins!
Finding problems to work on
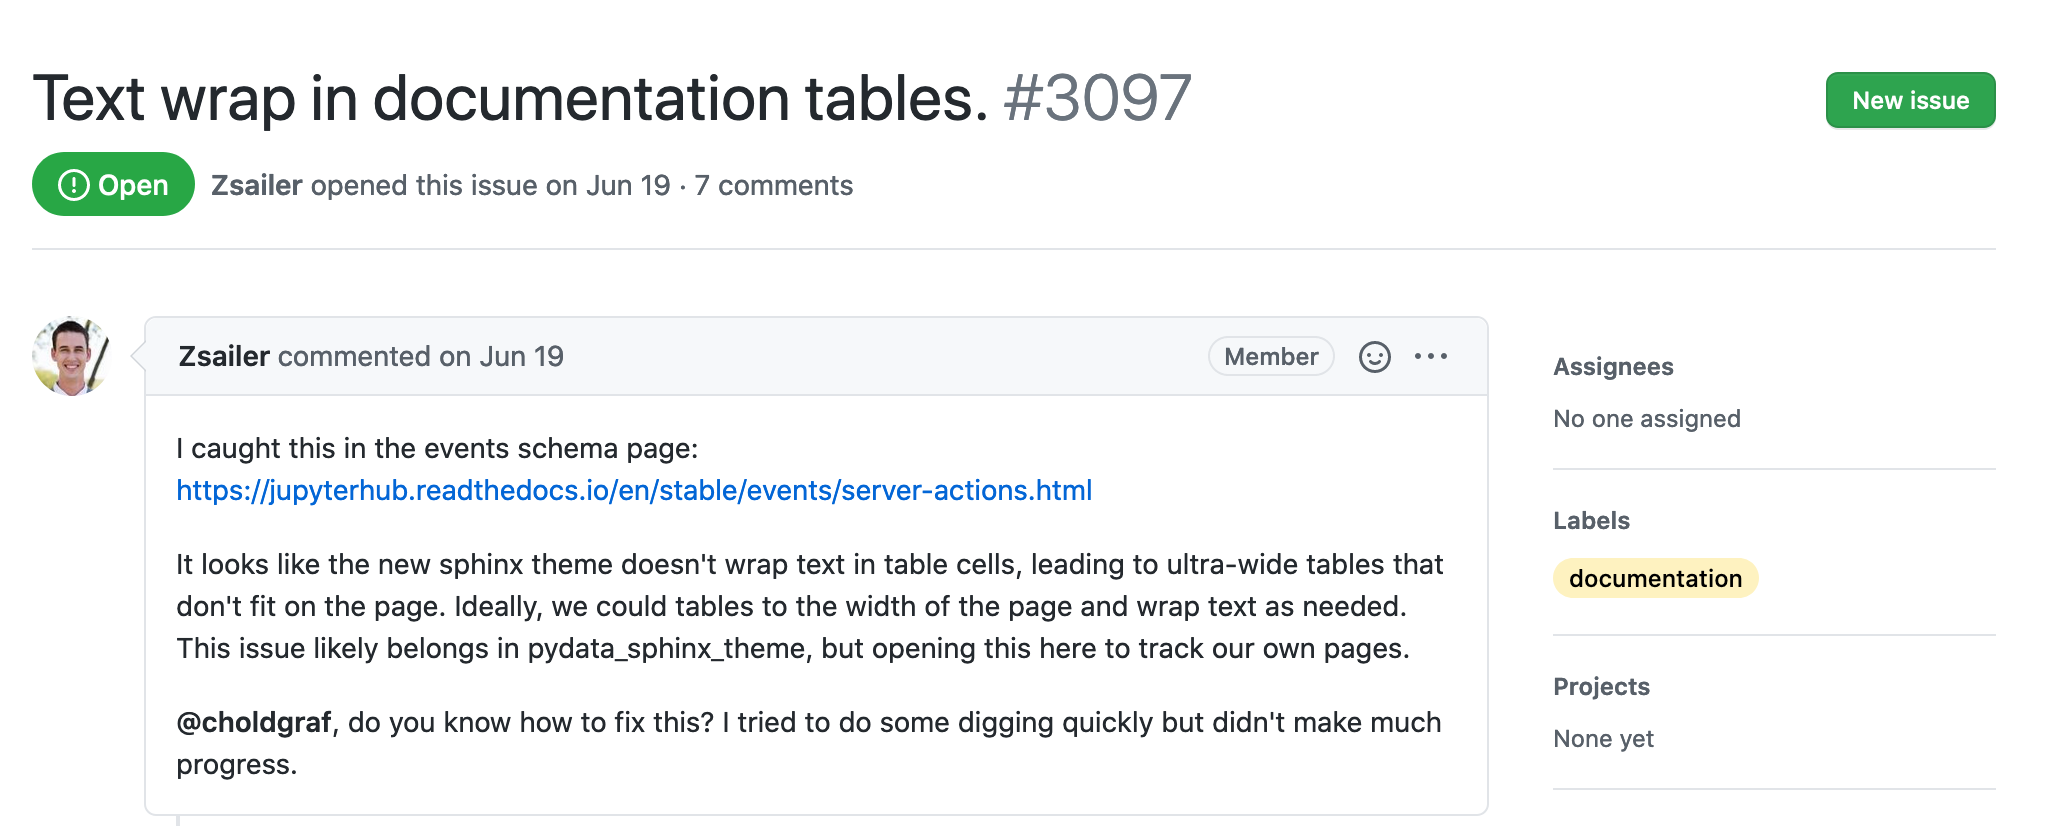
A big part of Hacktoberfest is finding bugs and features to work on in open source projects. In Github, each repository has a list of Issues. Issue is a card that will contain information reported by someone (a user or a maintainer) that will contain information about a bug or a feature that is required.
It also can contain a label indicating the type of issue it is. In the figure below you can see that Zach proposed a documentation change to the project where this Issue was opened.
Some projects also add labels like begginer friendly or easy to incentivize people that are starting on the project or on open source!
Happy Hacking!
Hope this helped you a little bit navigating in this amazing world! Git is actually a pretty powerful tool that most people don’t know a lot! So hopefully this excited you enough to search more about it 🤓 I haven’t talked about many things that are very interesting!
Check my wiki on git for some quick tips!
Also, you don’t always have to just contribute with code! Documentation is an important part of most projects and usually something that a lot of people overlook. Check this post about helping without changing any code!