The complete step-by-step guide to create and deploy your multi-language website - Part 1

I’ve written over and over about why you should have a blog and write on it. I made this website using nothing but free tools. The only thing I paid was my domain (leportella.com) and I find this super cool! 🤩
When I created my website I realied on a lot of different tutorials, one for each part of it. Because the process of creating it can be quite tricky, I decided to create a full, step-by-step tutorial.
Here are some of the things that we are going to work on :
- A working website, with support for single pages and blog posts
- Deploy using Github and Netlify
- Support for multiple languages
- Website statistics
- Domain configuration
- Comments
- Email inbound
The tutorial is going to be divided into a couple of parts:
- Part 1 - Minimum working example
- Part 2 - Adding a blog section and deploy it!
- Part 3 - Adding comments
- Part 4 - Multi-language support
- Part 5 - Adding a personalized domain
- Part 6 - Adding stastics
- Part 7 - Adding a email inbound section
For a full-working website, you’ll only need part 1 and 2. All other are additional things that you can add or skip as you’ll like.
This is part 1 and here’s what you will need before starting:
- A terminal
- Git
- A Github account
Installing Hugo
For this tutorial I will use Hugo, an open-source static site generators written in Go. I used other static site generators before but Hugo is so easy to use and fast that it soon became one of my favorite tools!
I installed Hugo on my computer using brew:
brew install hugo
If you have a different system than MacOS check the official installation guide.
Starting a new project
It’s time to create a new project. Let’s call it my-blog:
hugo new site my-blog
This will create a new folder called my-blog, that contains all the basic infrastructure for your website. We will basically use 3 things here:
- content/ : this is the folder where the content of our website, like pages and blogposts, will live
- config.toml: the configuration file of our project
- themes/ : the folder where we will add themes that will apply to our project
Installing a new theme
Our project is created but if we try to run it, it will just be an empty page. We need a style to make it fully functional.
You could create one from scratch but Hugo has a bunch of themes already prepared and ready to use! You can go to https://themes.gohugo.io/ and choose a theme you link. In this tutorial we will use the minimalist blog template that is cute and really easy to use 😉
First we need to make the current project a git environment:
git init
Now we will add the theme as a submodule inside the themes/ folder:
git submodule add https://github.com/jakewies/hugo-theme-codex.git themes/hugo-theme-codex
Submodules are and awesome Git feature. They allow you to keep a Git repository as a subdirectory of another Git repository. This means that this folder will be linked with the original repository and you can tale advantage of all updates of the theme you chose!
After running this command you will notice that there is a folder called PaperMod that contains everything we need.
Using a new theme
What we need to do now is tell Hugo that this is the theme that we will use. In the config.toml already have a couple of attributes, so can theme there:
baseURL = "http://example.org/"
languageCode = "en-us"
title = "My New Hugo Site"

theme = "hugo-theme-codex"
Let’s start!
Now we need to create a file, _index.md on the folder content, and add the following:
---
heading: "Hi, I'm Codex"
subheading: "A minimal blog theme for hugo."
handle: "hugo-theme-codex"
---
This is going to be what’s presented in our initial page. Let’s try it out!
We can start the server by running:
hugo server -D
You will see that it that the output has a lot of things but one of it is the address in which the website is running on:
Web Server is available at http://localhost:1313/ (bind address 127.0.0.1)
So let’s open the http://localhost:1313 and try it out:
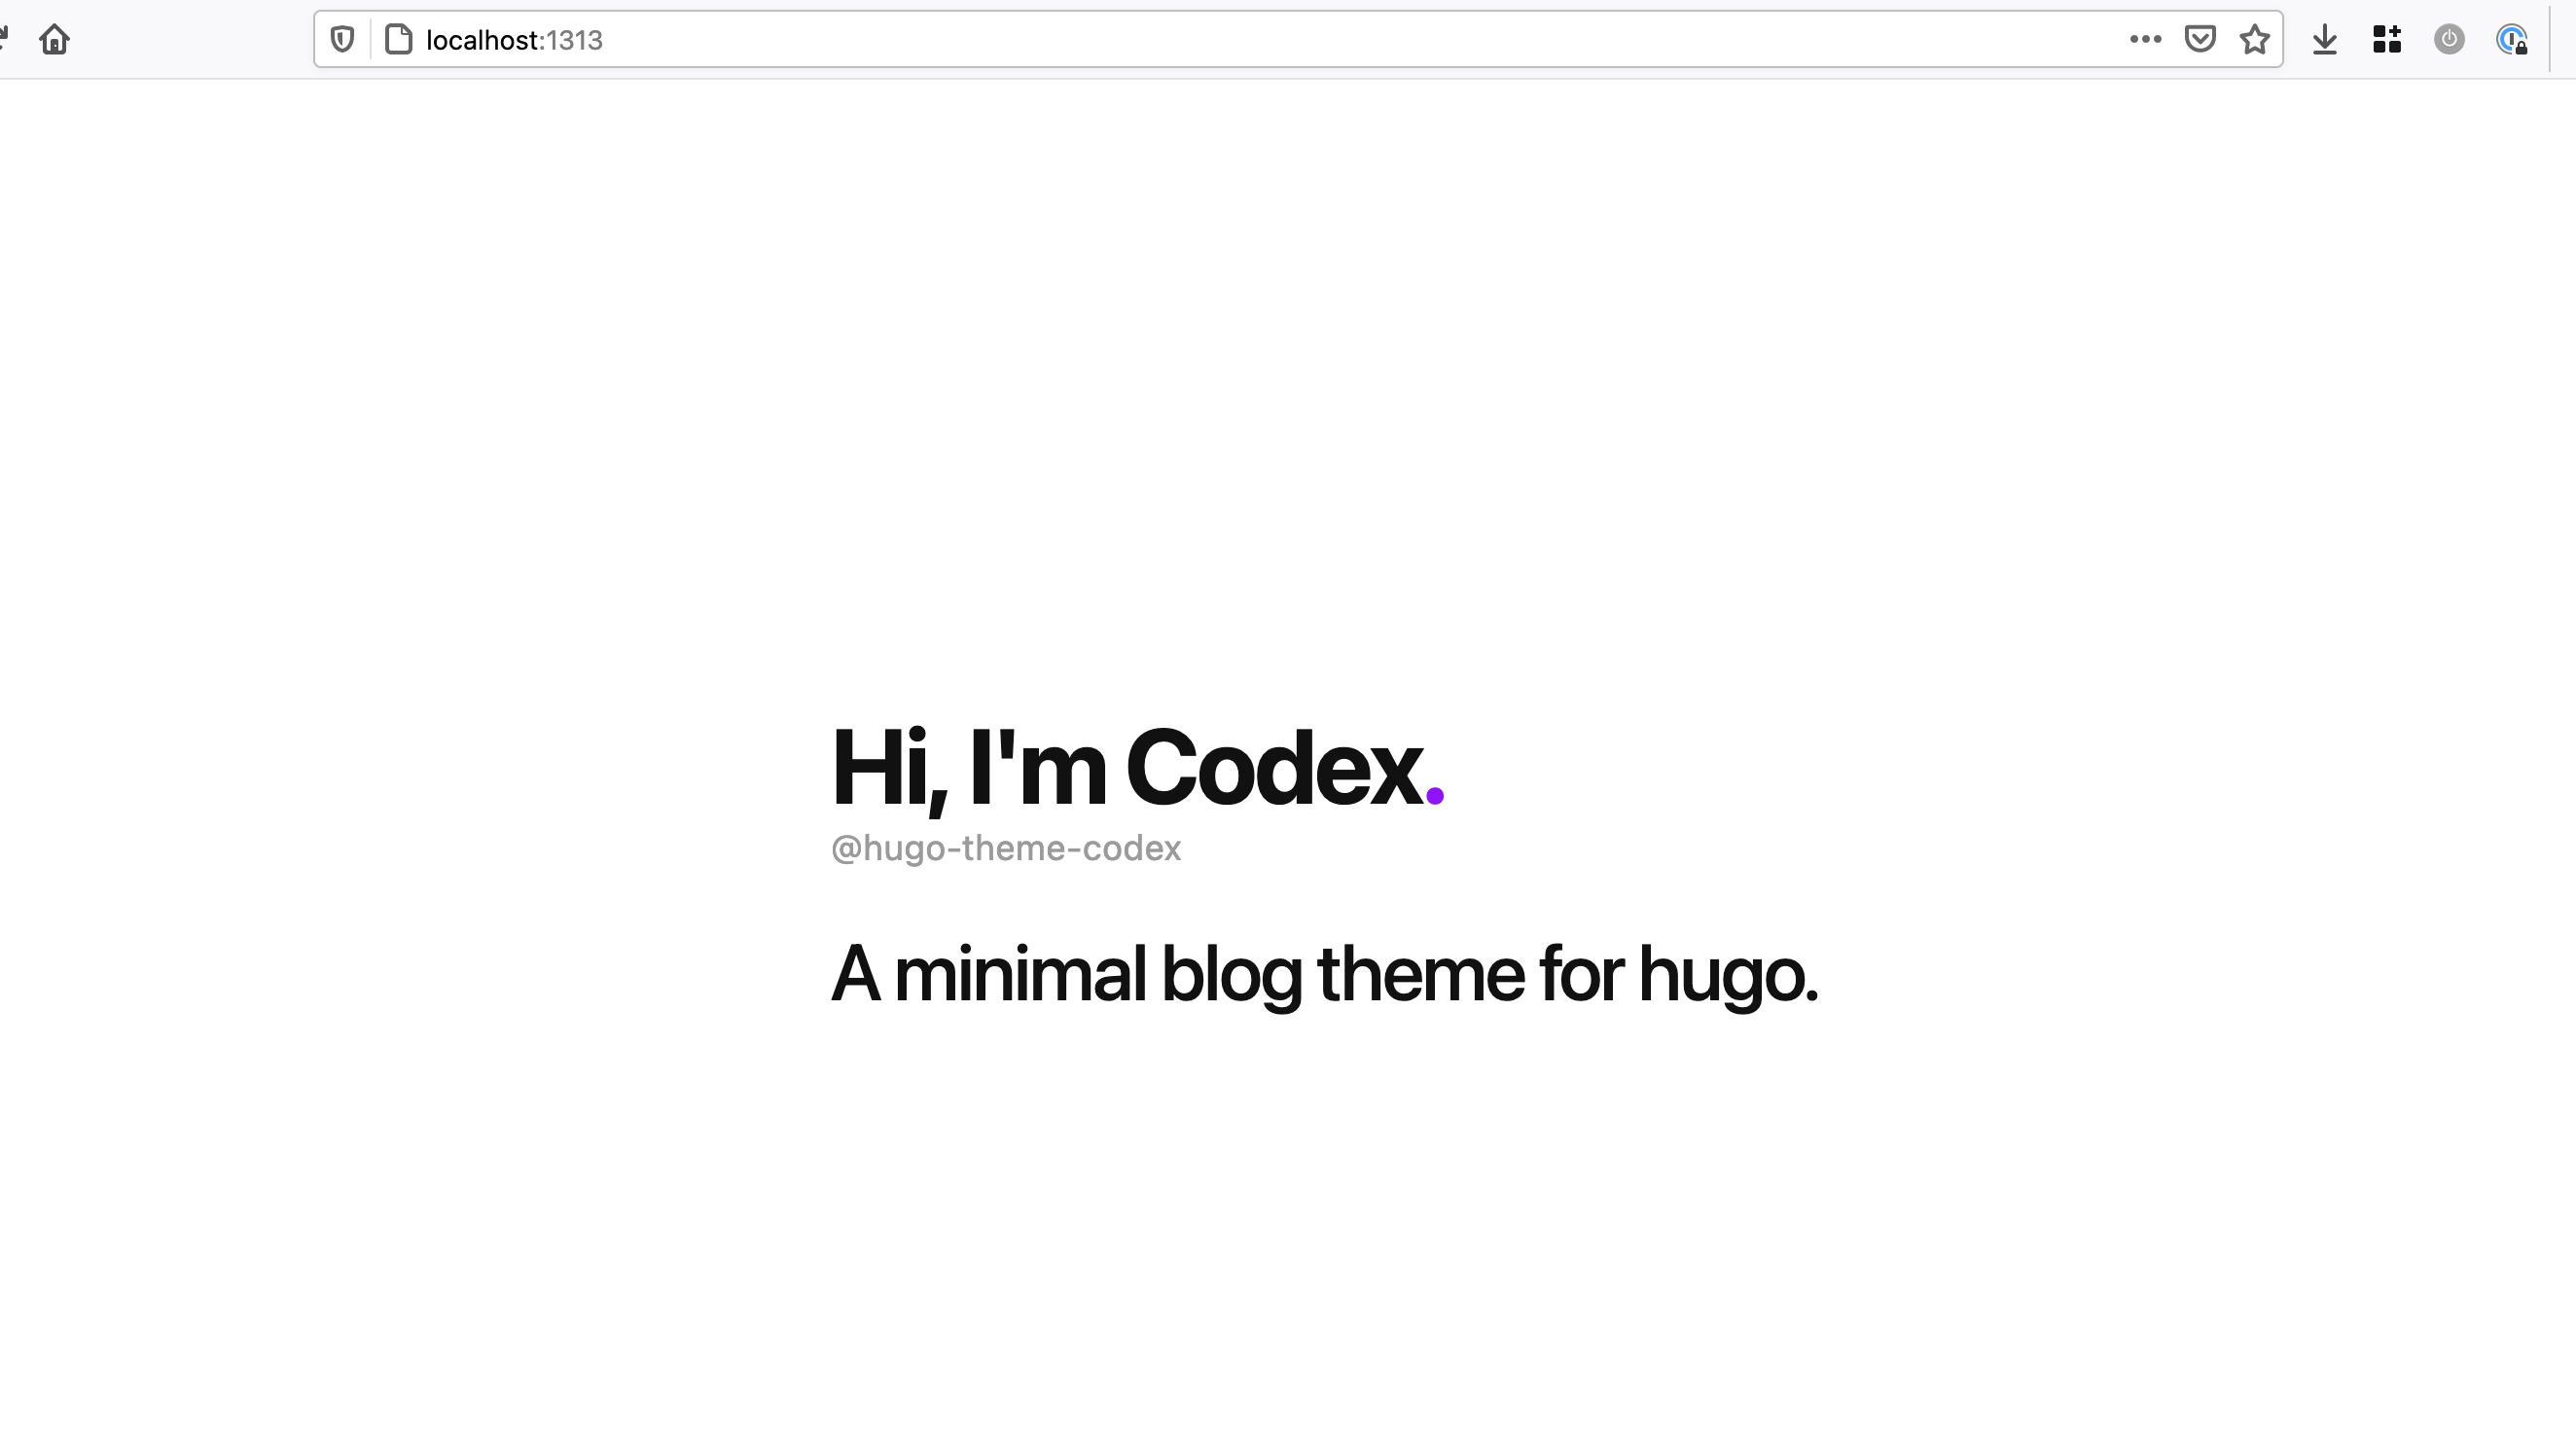
One of the things that really impressed me is how fast Hugo can build up. Couple of seconds and you are ready to go. Before using Hugo, I was using Jekyll and the build of my +100 posts was taking minutes to buld everytime I saved a file! Once I switched to Hugo, I get the same build in a couple of seconds!
With Hugo, you can leave the server running in one window and then change the files in the other and it will automatically recompile to the latest version.
You can also see a number of stats that Hugo is considering while compiling:
| EN
-------------------+-----
  Pages            |  3
  Paginator pages  |  0
  Non-page files   |  0
  Static files     |  0
  Processed images |  0
  Aliases          |  0
  Sitemaps         |  1
  Cleaned          |  0
Some configuration
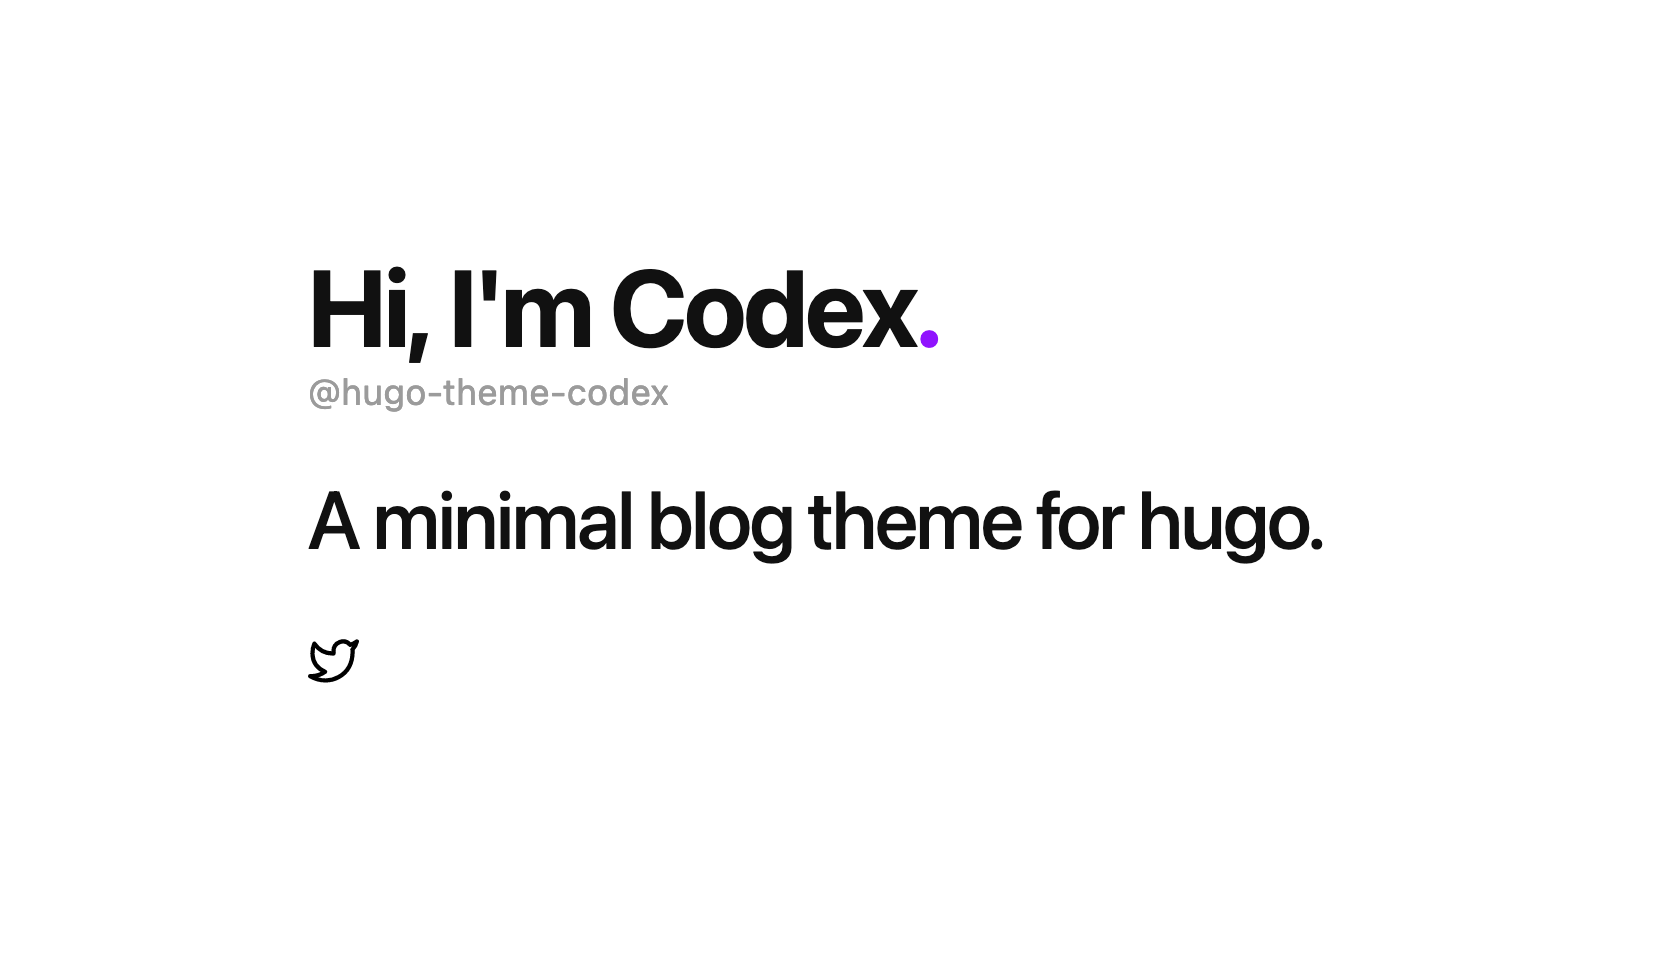
This theme also have some configuration to add some social networks links. We can add a twitter link in the config.toml :
[params]
  twitter = "https://twitter.com/leportella"
This particular template has support for multiple links and their icons. These are the supported ones you can add to the config file:
# supported links
twitter = "https://twitter.com/<your handle>"
github = "https://github.com/<your handle>"
email = "mailto:<your email>"
mastodon = "https://mastodon.social/@nickname"
facebook = "https://facebook.com/<your handle>"
gitlab = "https://gitlab.com/<your handle>"
instagram = "https://instagram.com/<your handle>"
linkedin = "<link to your profile>"
youtube = "https://www.youtube.com/channel/<your channel>"
You can also change the icon orders by adding the iconOrder list, like this:
iconOrder = [
    "Twitter",
  "GitHub",
  "Email",
  "Mastodon",
  "Facebook",
  "GitLab",
  "Instagram",
  "LinkedIn",
  "YouTube",
]
Once your save this new config you will see that the website is now updated with the icon links:
Yay! Congratulations! Now you have a basic landing-page website!
Send it to Github!
Time to make sure we don’t loose everything! Create a new repository in Github. Once you have it’s link you can add it as the remote origin of this folder:
git remote add origin [email protected]:leportella/hugo-blog-example.git
Now it is time to add and commit the files:
git add .
git commit -m "initial commit"
git push origin main
If you want, check how it looks like on my repository 🥰
Next steps
If you liked this tutorial, check Part 2 to learn how to add a blog section and deploy it!
❤ Cheers! Letícia